
Camera Slideshow
Installation
Installing Camera Slideshow for Joomla is a straightforward process that can be completed in a few simple steps. Here is an overview of the process:
-
Download the Camera Slideshow extension package (CameraSlideshow_UNZIP.zip) from the store or the email you have received after purchasing the extension and extract/unzip it.
-
Log in to the Joomla backend as an administrator.
-
Go to Extensions > Manage > Install.
-
Click the "Upload Package File" button and select the extension package you downloaded in step 1.
-
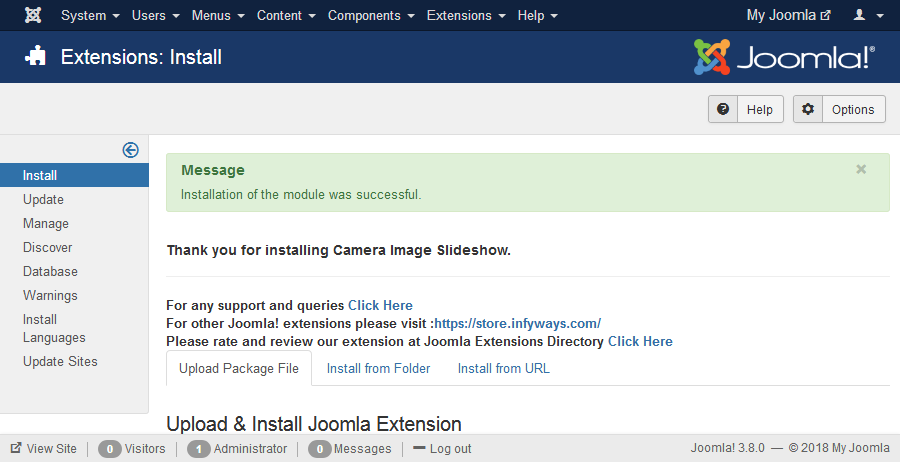
Click the "Upload & Install" button to begin the installation process.
-
Once the installation is complete, you will see a message indicating that the extension was installed successfully.
-
Go to Extensions > Modules and find the Camera Slideshow module.
-
Click on the "New" button to create a new instance of the module.
-
Configure the module according to your needs, by choosing the images, effects, captions, and other settings.
-
Publish the module in the desired position on your website.
Once the installation is complete, you can begin creating and customizing image slideshows on your website using the Camera Slideshow extension. Be sure to read the extension's documentation for more detailed instructions and information on how to use the various options and features mentioned below.
Setup

- After successful installation of the module, go to Extension > Modules and Search for Camera Slideshow. If you don't find it in the modules page then click on the New button in the top left corner of the page and add Camera Slideshow Module.
- After opening or adding a New instance of the Camera Slideshow module you can find different tabs with different parameters to set.
Module Tab Options
Show Title : Set the title of the Module to Hide if you don't want the title to appear in the frontend.
Position : Set the position of the module where you would like the slideshow to appear.
Menu Assignment Tab
To assign the module to a particular menu or all the menu go through the following documentation.
https://docs.joomla.org/How_do_you_assign_a_module_to_specific_pages%3F
General Settings
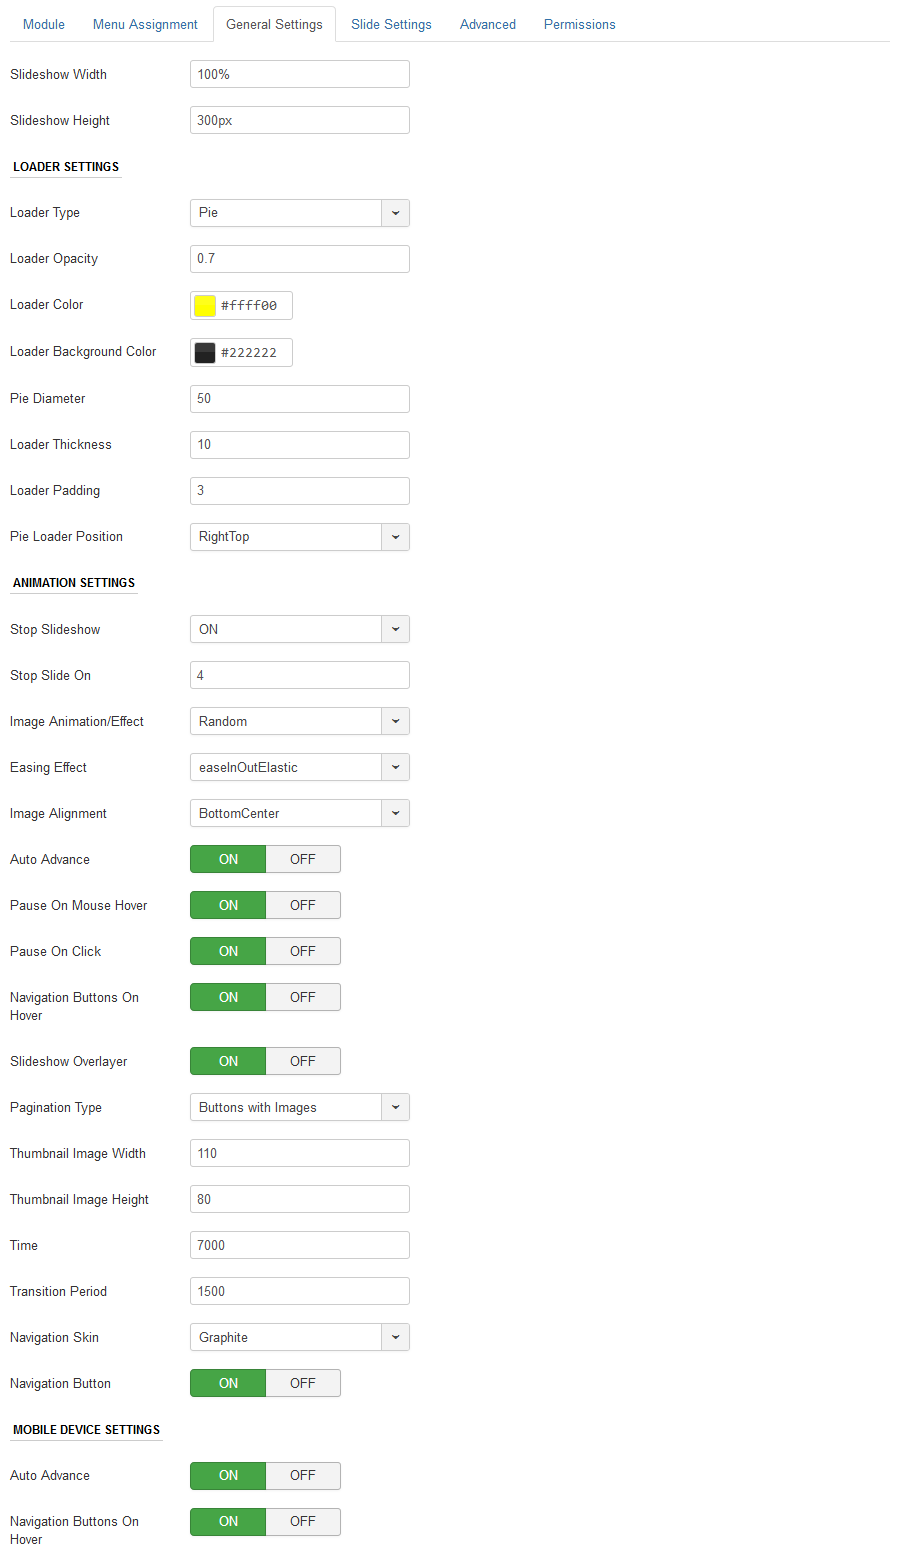
In general settings tab you can set the dimension, slideshow effects and other navigation settings.
- Slideshow Width : Set the width of the slideshow in pixels or percentage. For example you can set 100% or 1200px.
- Slideshow Height : Like the width you can set the height parameter pixels or percentage. If the width is set in percentage then use the height also in percentage.
Loader Settings
The loader of the slideshow appears on the slides. The loader can be completely customized using the following parameters.
- Loader Type : Set the loader type to None, Pie or Bar.
- Loader Opacity : Set the opacity of the loader. The range is 0.1 to 0.9.
- Loader Color : Select the loader color using the color picker to match your template.
- Loader Background Color : Select the background color of the loader.
- Pie Diameter : Set the diameter of the Pie loader. Ex: 50
- Loader Thickness : Set the thickness of the loader: Ex : 10
- Loader Padding: Padding around the loader can be set.
- Loader Position : Set the position of the loader on the slide.
Animation Settings
Camera Slideshow has more than 30 animation and easing effect.
- Stop Slideshow : Set it to ON if you want the slideshow on stop on a particular slide.
- Stop Slide on : Set the slide number in which you would like to stop the slideshow. Ex: 3, the slideshow if set to Auto Slide will automatically stop on slide number 3.
- Image Animation Effect : Choose the effect you would like the images to appear.
- Easing Effect : Easing adds more visual effects to the slideshow.
- Image Alignment : Set the position of the slideshow images inside the slide.
- Auto Advance : Set to ON if you would like the slideshow to change automatically.
- Pause on Mouseover: Set to ON if you want to pause the slideshow on hovering the slide.
- Pause on Click : Set to ON if you want to pause the slideshow on clicking the slide.
- Navigation Buttons on Hover : The Navigation Buttons/ Arrows appear when you hover on the slide. Set it to OFF if you don't want the navigation.
- Slideshow Overlayer : Select whether to put a layer on the images to prevent the users grab images simply by clicking the right button of their mouse.
- Pagination Type : Choose the pagination type for the slideshow. Ex : None, Buttons, Buttons with Images, Image Pagination.
- Thumbnail Image Width/Height : If the pagination type is set to Button with Images or Image Pagination then you have to set the width and height of the image thumb. Ex : 110.
- Time : It defines the milliseconds between the end of the sliding effect and the start of the next one.
-
: Length of the sliding effect in milliseconds.
- Navigation Skin : Select the navigation color skin from a list of 15+ skins to match your template.
- Navigation Button : Option to show or hide the slideshow navigation. Set ON to hide.
Mobile Device Settings
The slideshow has option to control few features for mobile devices.
- Auto Advance : Set to ON if you would like the slideshow to change automatically for mobile devices.
- Navigation Buttons On Hover : The Navigation Buttons/ Arrows appear when you hover on the slide. Set it to OFF if you don't want the navigation for mobile devices.
Slide Settings
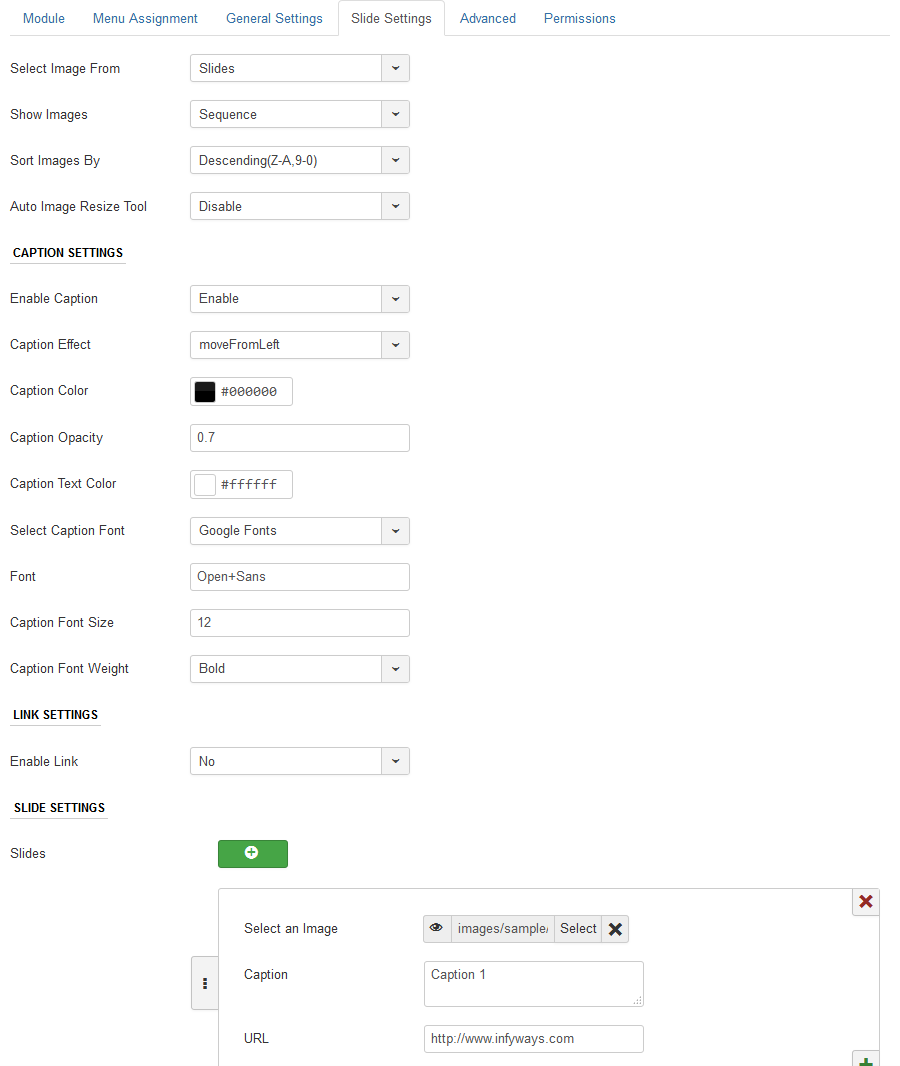
In Slide Settings you can either fetch images from folder or add images individually into the module and set the caption and link the slideshow to an URL.
- Select Images From : Option to fetch images from folder or set each slide in the module.
- Image Folder Path : Set the folder from which you would like to fetch the images of the slideshow. Ex : images/slideshow/
- Show Images : Option to show the slideshow of the images in sequential or randomly.
- Sort Images By : Sorting of slideshow images can be done ascending or descending order of the filename.
- Auto Resize Tool : We recommend to use only when the images uploaded into the media manager are not of the desired size.
- Resize Image By : If the resize tool is set to enabled, you can find this parameter which can help you resize the images by height, width or both. Set the values to 900 or 1000 without using px or percentage in the Image Height and Image Width parameters.
Caption Settings
- Enable Caption : Option to enable or disable the caption which appears on the slideshow.
- Enable Caption : Select the effect of the appearance of the caption on the slide.
- Caption Background Color : Select the color of the caption background using the color picker.
- Caption Opacity : Set the opacity of the caption bar. Range : 0.1 to 0.9
- Caption Text Color : Select the caption color using the color picker.
- Caption Font : You can use your own font, Google Fonts or the template default font.
- Font : If you want to use Google Fonts then go to https://fonts.google.com/, select a font name and add it to the field. For example you want to use Open Sans font the just mention Open+Sans in the field.
- Caption Font Size : This field accept values in pixels only. Ex : 14
- Caption Font Weight : Set the caption font thickness to Normal or Bold.
Link Settings
- Enable Link : Set it to Disable if you don't want to link the slides.
- Open In : You can set the links to open in same or new tab.
Slide Settings
To add a new slide, click on the + button. For each slide you have to fill 3 different parameters.
- Select an Image : Select the image from the media manager.
- Caption : Add Caption to the slideshow. You can add HTML tags into it.
- URL : Set the URL for the slide
You can add/remove/edit multiple number of slides.
Advanced Settings

- Extra CSS: You can add extra CSS into the module parameters easily without modifying any template CSS files.
How To

-
How to get the license key for the extension?
- Go to the Download Section of our store.
- If you already have an account then login or else you create an account if you are new to our store..
- Create an account using the same email address which you have used while purchasing the extension. (This isn't your Paypal email address but the address which you have provided in our store while purchasing)
- Once you login to the Download section you can find the License Key for the extension.
- How to find module positions of a template?
- How to insert the module inside an article?
- How to add license key to Joomla?
- Go to Update Sites and search for Camera Slideshow Updater and enter the Download Key from our store.